Showing posts with label Design Team. Show all posts

Monday, October 6, 2014

Chevron Cardstock Altered Notebook

Recently, we celebrated both our little girls birthday. What I wanted to make was a little notebook where our guests could pen down their message for my little girls to ponder upon when they're older. 

As with every little girl's birthday, all things glittery is a must :) So what I did was, to alter a little book that you can get from any dollar store and bling up the front cover with the very lovely chevron cardstock. 

 Here's what my project looks like:


Some close-ups


Instructions:
1) Cut out a piece of chevron cardstock to cover the entire front page of the book leaving about 0.5 inches all around

2) Next, cut out a smaller piece of a different colour and use an edge punch to create a pretty border (you can also use one of the cutesy border stickers by Doodlebug ;))

3) Layer some stickers and make your own banner using the same chevron cardstock and add some bling and twine

Materials Used:
Item:4087 12x12 lily white chevron sugar coated cardstock
Item:4088 12x12 gray chevron sugar coated cardstock
Item:4078 12x12 bubblegum chevron sugar coated cardstock
Item:4185 sugar shoppe this & that sticker
Item:3208 doodle twine - bumblebee


Wednesday, July 30, 2014

Treat Bag Interactive Slider Card

Hi there! Sharm here to show you what you can use those awesome treat bags by Doodlebug Designs for. The treat bags need not be used for the conventional treats..but can also incorporated into your paper projects in many ways. 

Some of the projects that I use the treat bags for are as follows: 
1) Storybook / Project Life Cards
2) Cards
3) Banners
4) Layouts 
5) Treat holders!

For my project today, I'd like to share with you a little interactive card I made.


Some close-ups

1) Slit a little strip about the size of the straw that comes in the pixies pack on the side of the treat bag. be careful to create the slit on only the top of the treat bag and that it doesnt cut right through the back.
(this will act as the slider).
* I would recommend that you completely open up the treat bag to do this

2) Put a flag right through the straw and cut off the protruding bits of the straw. You want it to look seamless. Further embellish with flowers etc

3) Cut a piece of cardstock to fit into the treat bag. Embellish the card and slot it into the treat bag. Make sure that part of the cardstock is visible through the slit you just created in step 1 and that it is tight enough

4) Once you have slot the card in, apply a thin line of glue on the slit (onto the cardstock) and adhere the little slider onto it. Once dried, move it back and forth to make sure it's able to move. When you move the slider flag, it should cause the little card inside the treat bag to move up

5) Gently push the card back in. Push the 'Hi' flag upwards to see the card inside the treat bag to pop-up again.

Materials Used:

Hope you'll have fun making this!

Monday, June 30, 2014

This Moment Tag - P13 DT

Hi there! Hope you're all having a lovely June so far..It's hard to believe we're halfway into the year so fast..this year has been filled with lots of emotions..roller coaster ones that have been far beyond i ever expected..nevertheles, it has been good so far..and I have God to thank for, for blessing us despite the hurdles that have come our way..

With that in mind, I always feel that we should live in this moment..embrace life..enjoy every second of it and most importantly live like there were no tomorrow :) Sharing with you, my 'This Moment' tag..


The roses and leaves are all die cut using the very pretty papers shared below and so is the frame. I then topped it off with some twine and blings

Materials Used:

 
                        for the frame                                   for the leaves

 
                         for the tag background                    for the rolled roses


Saturday, June 21, 2014

Tinkerbell Inspired Banner

Hello there!! This month the Design Team is sharing projects inspired by vellum. I'm sure you've been amazed by the inspiring projects so far. Today I'd like to share mine :) It's a banner that I made for my little girl's Birthday party which was to a tinkerbell theme. I knew the vellum paper by Doodlebug would be just perfect! :) 

The vellum was used for the leaves and layers of the banner pieces and what I did was to place the banner at the dessert  table. Here's my banner


Part of the banner in full

Close-ups of the banner pieces. I layered it on top of a plain coloured cardstock and also tucked some vellum leaves behind the flower


Materials Used:

Silhouette Cut file


Friday, June 13, 2014

Storybook Page

Hello there! Sharm here to share a storybook page using the Hip Hip Hooray Collection. For those of you who are going 'gah, storybook page?' well, simply put, it is very similar to the very fast growing mode of scrapbooking called project life. I shall be very honest with you.. this is my very first attempt at this current-in-trend scrapbooking method.

I have always wanted to have a go at it, but was worried that I may not be able to catch up and maybe even run out of photos to scrap. But the beauty of this is, you need not follow what everyone else is doing. You just need to go at your own pace :)

Since I had the privilege of making one for my DT assignment this month, I must say, I LOVE This!! and the fact that Doodlebug Designs caters for this trend is simply amazing! Imagine the cutesy spreads you can come up with ;)

Without further delay, here's my spread ;)


I chose to document my wish list for my two girls and instead of using the usual pink for girls, I wanted to try something different and feel this theme turned out more than just right. Here are some closeups:


What I did was to further embellish the simply put cards of the said collection and on the last photo, I cut out a 12x2 strip of patterned paper and embellished it with washi tape! :)

Materials Used:
Item:4118  micro monsters washi tape Item:4119 ziggity zag washi tape
Item:4186 hip hip hooray this & that sticker Item:4193 hip hip hooray fancy frill CS stickerItem:4217 hip hip hooray mini tags cs stickers 
Item:4218 monsters icon mini cs stickersItem:4208 hip hip hooray simply put album inserts


Spring Themed Exploding Box

Hello again Doodlebug fans! Sharm here to share a little Easter project..an Exploding Box. So what exactly is this exploding box? It's a box that looks perfectly normal on the outside, but when you lift the lid, it's opens the box into a flat paper with lots of pop-ups and layers! Like a Jack-in-the-box, only the scrapbooking way lol! :)

So here's how I made my project:
Step 1: Score a 12x12 sheet of paper at 4" & 8". Cut to off the for corner squares
Step 2: For the lid, score at 4 1/8" & 8 1/8"
Step 3: Fold the make a box & its lid
Step 4: Embellish!


Some Close-ups:

The perfectly normal looking box :)

Ta da! Once you open the box

The Left side, embellished

The right side, embellished

This is what it looks like once opened

Top of the Box

Doodlebug Designs Inc Materials Used:

Well, let me know if you have a go at making this project! :) Hope you'll enjoy it as much as I did!!


Sunday, June 1, 2014

Mortar Board Shaped Box with Mini Cards

Hello there! Sharm here to share with you a little something I made using the lovely Graduation collection. I adore this collection not only cause of the cute lil ol' owl, but also cause of all that gold and silver and super awesome washi tapes!! :) It's not usual Graduation collection, but I do think it adds a differently gorgeous touch! HERE's where you can find the entire collection

The box is a Silhouette cameo file while the mini cards were put together using two different sized circle punches. Here's what I made.


This little box is too cute dont you think? :)


Some Close-ups of the mini cards


Tuesday, April 8, 2014

Pull & Flip Mini Album

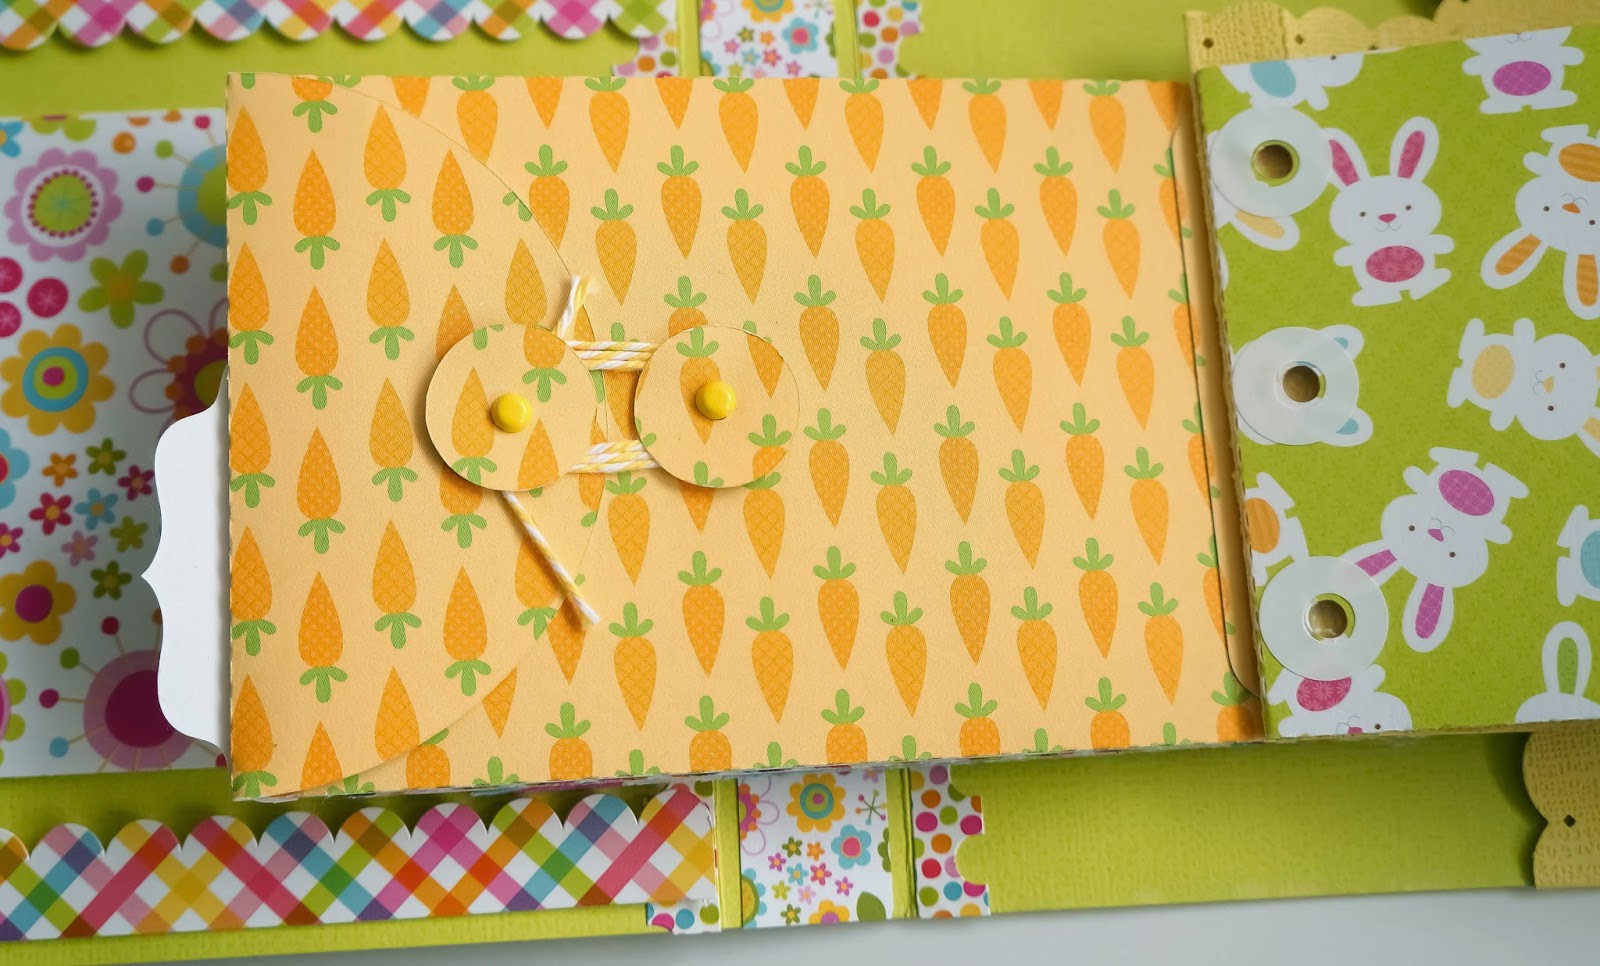
Hi there! Spring is here!! Oh at Doodlebug at least *lol* :) And I went to town by creating not 1 or 2 projects, but 4!! That's how awesome this collection is. 

What makes it even better is that this collection is so versatile, that you dont need to just limit yourself to making Easter themed projects. For instance, what I have made here is an envelope pull to flip mini album.

A little bit about this project:
1) Each page of the album is actually a tie string envelope. I made this using a Silhouette Cameo file
2) The album contains photos of my second bub when she was just born! :) 
3) Pull, the little pink tag at the end to see the album flip page by page on it's own. It's almost mechanical lol!


 The Cover of the mini album

Back of cover & first page

First page of the album

This is how the album looks page by page

This is how the envelope looks

Doodlebug Designs Inc Materials Used:


Thursday, March 13, 2014

Love Layout - Doodlebug's Kraft in Color Collection

Hello! hello! Today I'd like to share with you a layout made using the Kraft in Color collection that is part of Doodlebug Designs' winter release. The layout was put together using my trusted silhouette cameo, some stitching and of course the lovely sequins by Doodlebug! The sequins are pretty awesome! each bottle contains ombre coloured sequins and they are perfect! The papers with their coordinating patterns are great to work with too! 

What I did was to cut out the bubble like pattern that's used for the background, from my cameo. Then, the circles that were left behind were flipped over to reveal the coordinating pattern of the patterned paper I used for the bubbles. I then stuck them slightly away from the empty bubble to create more layers. I hope I'm not confusing you here lol!!


The complete layout

I created little tab pages to layer the photo on

Some sequins at the corners and stitching 

Materials Used:

Friday, February 28, 2014

Treat Bag & Card

Hello there!! Hope you lovely crafters are having an amazing time.. :) I cant believe January flew by...and now looks like February too! These days, time flies so fast dont you think? :)

Anyhow, I'd like to share 2 projects I recently made to share with you! First one up, is a treat bag whilst the second, is a card

Here's my first project:


I used a Silhouette cut file to make this. I also added some die cuts, punch outs an handmade flowers. All of course using p13 papers! :) Here are the papers I used for this project:


MAŁA CZARNA  /  LITTLE BLACK DRESS

UJĘCIE  /  SNAPSHOT

ŚLUB W LAS VEGAS   /   WEDDING IN LAS VEGAS

---------------------------------------------------------------------------------

Next up, is a card. I made this for Valentine's day but I think i;ts good for any day! :) Even as a "Welcome Baby" card don't you think? Here's my card:


I added some stitching and fussy cut details around the card. Along with some layers of doily and tag. To finish off, I added a Doodlebug jewel at either corner.

Some of the papers used for this project:


Hope my projects inspire you! Have a lovely time you all! :)